Particle Analyzer
Technical Cleanliness Solutions
Technical cleanliness plays an important role, especially in areas where components are manufactured, such as electrical engineering or the automotive industry. If contamination occurs at particle-sensitive points, this can quickly lead to functional impairments or even malfunctions. If the residual dirt in a system is so low that no damage occurs, it is considered technically clean.
Technical cleanliness is particularly important in the following sectors:
Automotive & Electric Vehicles
Medical
Industry
Mechanical Engineering
Additive Manufacturing
Electrical Engineering
& Battery Production
Optical
Industry
Oil Analysis
& Hydraulics

Importance of Technical Cleanliness
Thanks to technological progress, many industries require increasingly complex systems. As early as the 1990s, there was an increase in damage caused by contamination on components in the automotive industry. It quickly became clear that procedures had to be standardized. The so-called “VDA 19 Guideline”, also known as “Testing of Technical Cleanliness – Particle Contamination of Functionally Relevant Automotive Parts”, was published in 2004 and revised in 2015 as VDA 19 Part 1. At the international level, ISO 16232 (2007) forms the standard set of regulations. VDA 19 Part 2 from 2010 contains a guideline of rules for cleanliness-relevant orientation of assembly production.
VDA 19 Part 1 precisely defines various types of contamination. With the help of these definitions, contamination can be detected by cleanliness analyses and other technical cleanliness processes and appropriate decisions can be made. The aim is to preventively avoid residual dirt on components.
Fibres
- The ratio of length to width is 1:20
- Width of a fiber: ≤ 50 µm
Particles
Metal
Plastics
Minerals
Gums
Salts
Maximum Cleanliness – Maximum Quality
Particle contamination is the enemy of efficiency, functionality and longevity of any product. For example, research has shown that the main source of failure in hydraulic and oil-filled systems is due to particulate contamination. Oil analysis helps minimize maintenance costs and improve machine uptime.

Technical cleanliness of components | Oil cleanliness | Cleanliness of medical devices in the manufacturing process |
|---|---|---|
VDA 19.1 | ISO 4406 | VDI 2083, part 21 |
VDA 19.2 (Illig Value) | ISO 4007 | |
ISO 16232 | DIN 51455 | |
SAE AS 4059 |
In order to create cleanliness reports with all relevant data in one work step ZEISS microscopes and HYDAC extraction instruments are able to exchange data in a seamless workflow into one report for more productivity.
Learn all about how ZEISS integrates data from HYDAC devices into reporting in our magazine. A success story of technical cleanliness for the automotive industry.
Possible Contamination Sources and Applications

Particles on Bearings

Particles in Auto components

Particles in Oil and Lubricants

Particles between electrical contacts. For e.g. on PCB board

Particles on Medical Devices like Syringes and Implants
50 Percent Faster
More efficient with innovative ZEISS software solution
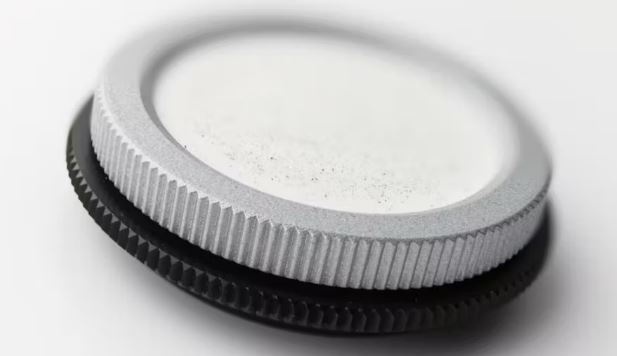
In addition to the quantification of particles and the measurement of their size, the standards for technical cleanliness also require a differentiation between metallic-glossy and non-glossy particles. Conventional methods can only make this distinction by scanning the filter membrane twice, each time with different polarizer and analyzer orientations. With the award-winning ZEISS One-Scan Technology, this is now possible with just one scan – reducing the time-to-result by up to 50 percent. In March 2021, the Fraunhofer Institute for Manufacturing Engineering and Automation (IPA) awarded ZEISS with its One-Scan Technology first place in the REINER! Fraunhofer Purity Technology Award.
The evaluation with ZEISS ZEN core Technical Cleanliness Analysis includes:
- A fully automatic evaluation
- Information on size, length, area and coordinates of the artifacts
- The distinction between metallic shiny and non-metallic shiny particles can be made with a single scan of the filter membrane
- Artifacts with a division into size classes, as a point cloud with product fingerprint


Maximum Productivity
ZEISS software accelerates classification of particles with machine learning
Technical cleanliness is part of the ZEN core software portfolio from the industrial microscopy sector. To optimize particle classification, ZEISS now offers ZEISS ZEN core users the Technical Cleanliness Analysis („TCA“) solution with three pre-trained modules based on machine learning. This module offers the functionality to classify particles based on measured parameters of an analyzed image. Samples are analyzed via three pre-trained machine learning models which can be additionally trained by users & customers. Samples are analyzed via gray scale determination and the pre-trained Machine Learning model for object classification runs in the background in the new TCA job templates, while the type classification is checked in parallel, based on the existing particle measurement results. This additional check of the type classification via machine learning algorithms „looks at” the particle results obtained with the classical analysis for size, shape, intensity and type classification, among others, and combines the various features into a large number of uncorrelated decision trees. The results are evaluated individually for each decision tree using the classification trained to the object classification model. The result is an automatic prediction of the particle type.
Increase Productivity
Up to 50% reduction of misscalssification of dark metallic parts and up to 25 % time savings

Particle Image with and without object classification in comaprison:
e.g. with 10 samples this means a potential time saving of 3.5 hours/day.
Check Technical Cleanliness Thanks to Exceeding Standards
The ZEISS portfolio enables combined particle detection and classification in a highly efficient workflow that not only finds particles, but also classifies them according to the origin of the contamination.
With ZEISS, you can combine data from light and electron microscopes in a single work process to obtain additional information. In this way, obtain well-founded insights into the cause of contamination.

Comprehensive Technical Cleanliness Thanks to ZEISS
Light microscopy systems
Recognize potential contamination hazards
Itemize particles by quantity, size distribution and morphology, and distinguish metallic from non-metallic particles and fibers down to 2 μm. Create cleanliness reports according to industry standards.
Correlative particle analysis
Establish advanced analysis workflows
Characterize process-critical particles and identify critical particlesusing correlative microscopy, which combines your data from both light and electron microscopes in a single workflow.
Electron Microscopy & EDS Systems
Locate sources of contamination
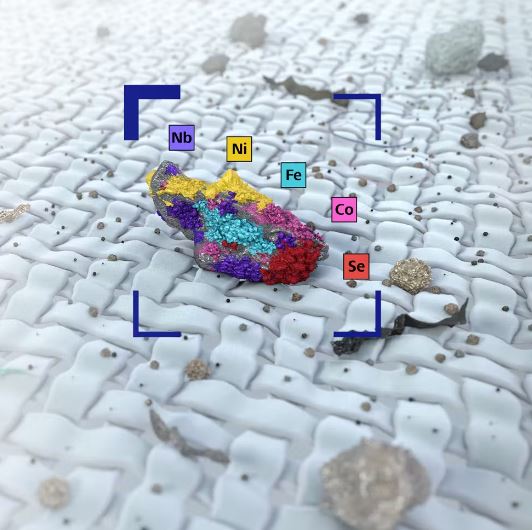
Measure the morphological properties of particles and use fully automated elemental analysis to classify particles by chemical composition. ZEISS SmartPI, the particle analysis software for electron microscopes, automates the detection, analysis, and classification of particles, combining microscope control, image processing and elemental analysis into a single application.
Light and Electron Microscopes manufactured by ZEISS for Technical Cleanliness

ZEISS SteREO Discovery V8

ZEISS Axio Zoom V16

ZEISS Axio Imager 2

ZEISS Axioscope 7

ZEISS EVO

ZEISS Sigma 300
